Lime Squad IV: The pets, straw clay lime kilns.
“None of these goals and design parameters will be considered in a myopic sense. Context must be considered with an assessment of cost benefit ratios in a holistic sense that includes values beyond convenience and control.”
After taking lime burning in a steel drum as far as we felt we could without adding something to the drum. Tonia and I decided to venture off into building a kiln with available materials. That was one goal- to explore the possibilities of available materials. Another was to experiment with design changes in order to improve smoke and efficiency issues. We decided to add a grate and a fire box to see where that would lead us and how effective burning the fire separate from the shells might be. The metal drum taught us that we needed either insulation, or mass, or both together which I gave the silly, but relevant, name massulation. We thought of using some bricks that were around, but decided to go a little more primal using stuff we might be able to scrounge up anywhere. That meant having a base which could support a grate. We chose to use bricks for just the base because it was faster for our experimental purposes than mudding one up with cob, though the cob would probably have worked better. We slapped some mud onto the outside of the bricks to seal most of the air leaks. The base had a short firebox leading to a grate at the bottom of the column.
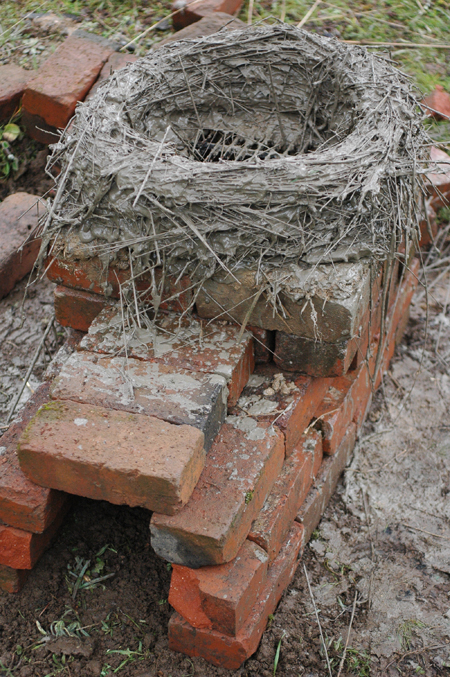
The Pet’s base, slapped together with bricks and then covered in mud, was a quick way to try out the idea of utilizing a fire box and a grate.
I got the idea for the kiln body material from a visit to Emerald Earth, a local community that does a lot of natural building. They use a wattle and daub system that replaces the stick wattle with bundles of straw dipped in clay slip. I decided that it would probably work for burning a kiln at least one time. It seemed like a lot of work, so to cut down, we just dipped the bundles of straw in slip and laid them up without any vertical supports. And it worked fine. We pulled up bundles of dry wild grass straw, dipped them in a rough clay slip made using some clay from a deposit here on the land, and just built it right up. The walls turned out about 3 inches thick or so. Since the straw is hollow, and the slip has substantial weight, this system gave us just the massulation that we were after with very little effort. Our friend Yoshi said it seemed kind of like a pet and the name stuck.
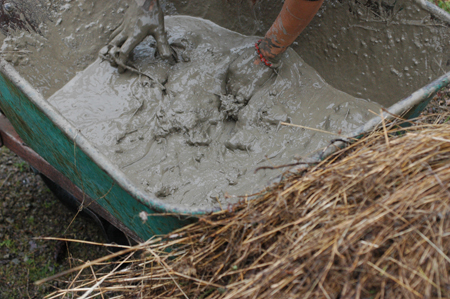
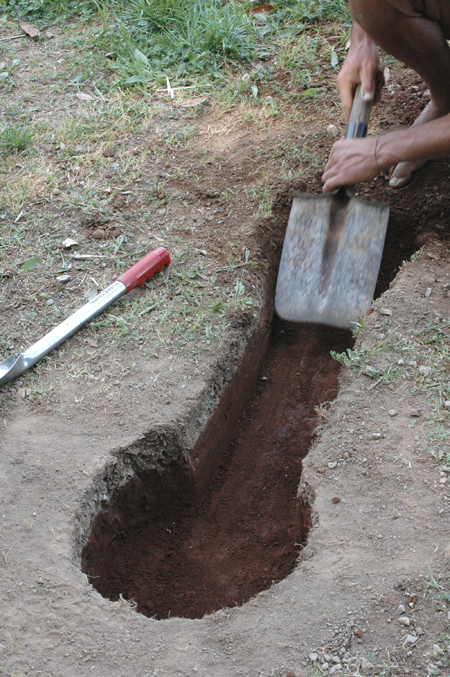
Clay slip was made from some clay we dug up while digging a vernal pool. The slip is pretty thick and we used quite a bit, since that is the glue that holds the whole thing together. I also figured that a thick coat of clay around the straw would protect it from burning up too quickly.
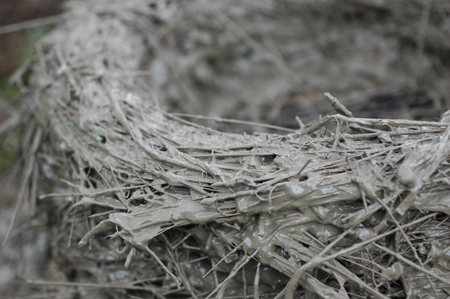
As you can see there is a lot of clay in there. The slip is very thick and the straw is well saturated. The clay must hold together to an extent after the straw is burned out.
The shape of the body was somewhat constricted toward the top. Given no limitations in materials, I’d be inclined to build a kiln slightly bulged in the middle and constricted slightly at top and bottom, with the top considerably more restricted. Many traditional kilns are made this way. I can’t say why for sure, but I think it’s because the larger space in the middle would give the gasses and heat a place to sort of spread out and slow down, while the constricted top could further slow the gasses down. Also, if the inside is somewhat spherical or concave, the heat radiating from the heated walls would be radiating down and up instead of straight across, which would at least theoretically retain the heat longer as it bounce back and forth inside the curved walls of the kiln. That’s what my intuition tells me anyway.

The Pet was given a slight taper toward the top. (photo by tonia sing chi)
A small fire was kindled in the fire box to dry the kiln more quickly. When it was partially dry and firm to the touch we did a burn in it. Burning just the firebox, with no fuel in the kiln body was hopeless, as I suspected it would be. Maybe it could work if using a large burn chamber with a relatively smaller kiln and a ton of wood to really pump an intense amount of heat in there. Such an arrangement might also require more insulation than we had. While our straw/clay kiln body contained a lot of pore space, there was also a considerable amount of clay in the body which would suck heat away. Still, I don’t recall the outside of the kiln ever being super hot, so we were retaining most of the heat, or at least losing out the top as would be expected, rather than out the sides. Using alternating layers of fuel and shells, the firebox seemed of some assistance in getting the fire off and running with less smoke, but probably not enough to justify it’s existence. Overall, I would say that the firebox was a fail. The good news is that the percentage of thoroughly calcined shells did go up when doing mixed fuel/shell burns. Shells touching the side of the kiln were not destined to be under-calcined as they are when using a plain steel drum.

The percentage of calcined shells in the pet was always higher than in the drum. These shells look well burned. Note the clay bits from erosion of the walls. Every burn took another layer of kiln with it. Hmmm, I wonder if you could use that as pozzolan!?
We burned at least 8 burns in the pet before it disintegrated. It was covered from the rain at all times. It became fragile after a few burns and was barely nursed along for the last 2 or 3. That seems like a waste of effort, but there are good points. I think the burned clay will make a great soil amendment, we didn’t have to buy anything, it was fun to build and we got a little exercise. In researching historic accounts of biochar in Europe and North America, I found a number of references to the great value of burned clay being used as a soil amendment. The clay burned from the pet is really neat. The straw burned away in most of it, leaving small tubes throughout. A nifty system might be to burn agricultural lime in a similar kiln, while producing charcoal if possible, and then putting the whole lot into the soil when the kiln is too burned out to use anymore. It may be quite a bit of work, but the charcoal and clay should be a permanent investment, not like a one time fertilizer application.
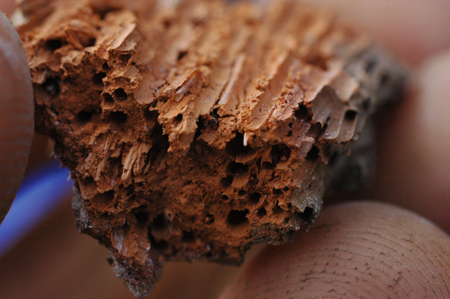
The pets walls fired into a light weight tubular clay bearing the impression of each straw. The inside of the kiln eroded away a little with each burn until holes started to appear in the walls near the top where there is more oxygen. residual ash, the whole charred clay body of the kiln, and bits of lime were all pulverized and added to a garden bed as fertilizer/soil conditioning. If a kiln like this was built as a one off for burning a single batch, or maybe just a couple batches, of lime, it could be built much more quickly and sloppily while still getting the job done. Lime is difficult to grind up for agricultural use under traditional conditions, but easy to slake once burned. Since the burned clay may have a lot of value as a soil amendment, it seems like an idea worth assessing further for agricultural lime burning. If charcoal could be produced at the same time, that would make it an even more compelling idea.
Pet version 2.0 was built at The Buckeye Gathering in 2012. We built this one with Bryce the blacksmith as a dual smelter/lime kiln, using a bale of wheat straw and clay slip. Bryce collected some iron ore to smelt and we thought we could maybe cook two birds with one kiln. this time we dug into the ground a little to make a gathering area for the slag. That didn’t work so well with the lime burning, and probably not for the smelting either. It just created a cool zone against the back of the kiln, in spite of adding 3 vent holes at ground level. The lime burned, but there was a high percentage of under calcined shells. The smelting also failed, but we were inclined to think that fail was due to bad iron ore rather than to the kiln design, or management. Lesson learned for lime burning, the air should come from the bottom of the kiln, not part way up. That may not be true in taller kilns, but for the micro scale kilns, I think it probably is very important to have the air enter at ground level. This kiln was only burned twice and was then abandoned on site, but it had more burns in it yet.

The Pet 2.0 in action. (photos by tonia sing chi)
The pet’s straw clay concept is pretty cool. It’s fast to slap together and doesn’t require that you buy anything. Once burned out, there is no waste and, if anything, the leftovers are useful. I would recommend building it on a low cob base, or just on the ground leaving four vents at ground level created by two shallow, intersecting trenches crossing each other in the center. A slight constriction toward the top would probably be a good idea. If the kiln is taller than you can reach into from top to bottom, you would probably need to build in an archway at the bottom for cleaning it out. This design, which is basically like burning in a drum (see part one of this update), but with mass and insulation, does not solve the problem of excessive smoke. For that solution, it’s back to the drawing board. Smoke can be reduced a little by starting a fire before adding wood and shells in layers, allowing each layer to get underway before adding the next. Burning from the top is also an option, but probably would require extending the height considerably with some provisions for flaring off gases (see below for more on this concept.) Cob (a mixture of clay, sand and straw for those who don’t already know) could be used to build a kiln and would probably outlast a pet by a long stretch. It would also be a lot more work and still far from permanent. Cob would also be much less insulating than the pet’s clay coated straw construction. I have the good fortune to hang out a little with Kiko Denzer each year at the Buckeye Gathering. He is pretty savvy when it comes to fire stuff. One of his ideas was to use sawdust, or probably more like wood flour, mixed with clay to build a kiln body; he says this is how firebricks are made. The sawdust would serve as a sort of aggregate, but would burn out when fired, leaving a light, porous material. Another idea he tossed out was to try a technique used in firing pottery, where the wood and pots stacked together are wrapped with newspaper which is first dipped in clay slip. This forms a temporary kiln.

The pet two. (photo by tonia sing chi)
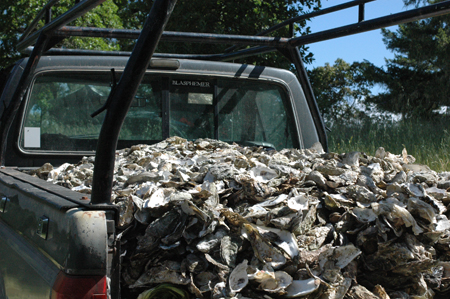
If energy and other priorities don’t get in the way (not unlikely), I’m hoping to explore home-scale lime burning some more. The objective is to keep kiln design simple and accessible in order to remain inline with homey goals, while increasing efficiency and decreasing pollution in the form of smoke. Raising the percentage of thoroughly calcined shells as close to 100% as possible is also on the agenda, but that really falls under efficiency. None of these goals and design parameters will be considered in a myopic sense. Context must be considered with an assessment of cost benefit ratios in a holistic sense that includes values beyond convenience and control. This is important (thus the bold italics ;). For instance I am not going to focus narrowly on 100% calcination if it means burning 50% more fuel. And what would I profit from a small gain in any goal if it means buying 500.00 worth of special manufactured insulating material or switching from wood to propane? The smoke issue will probably take priority for now. I’m interested in a concept called TLUD Top Lit Up Draft. I did one top lit burn in the pet using a piece of stovepipe to extend the kiln in order to provide draw. The TLUD concept also requires flaring off of unburned gasses which, for me, was provided by unsealed gaps between the top of the kiln and the stove pipe. The burn went Ok as I remember (though I’m not sure how well I do, I think I’d remember if it went very poorly), and with much less smoke. so I’m encouraged. The basic concept is that the draft comes in at the bottom (the air is often preheated by passing through a space between the inside container which holds the burn and an outside layer) and travels all the way through the kiln where it is consumed by the fire at the combustion zone. Since the fire is lit from the the top, it is not smothered by a giant pile of fuel and shells as it is in a bottom lit kiln. The fire is actually starved for oxygen in a way, but the extra gasses created by that are flared off at the top of the unit, consuming all of the smoke. The TLUD concept is used in gasification stoves and to produce biochar. I have some new metal drums to play with and already hope to be exploring this idea for making charcoal to use as a soil amendment. Finally, I’ve been interested from the start in exploring the possibility of producing biochar and lime at the same time. I have no idea if that can work yet, but I’d sure like to try. I hope to produce a lot of char anyway and it would be nice to use that heat for something. Since we have acidic soils here, lime is a necessary addition, though using char in the soil is supposed to help raise ph as well. I can get oyster shells by the ton for cheap or free (except gas and driving of course), so calcining a few shells while already producing a bunch of heat during charring sounds pretty awesome. If that works, I have a feeling it will be in a fast burning, high heat TLUD design with mostly wood and just a few shells. Those shells would still add up though when making a lot of char. Hopefully this will not be the last lime burning post. If anyone tries any of these ideas, please come back and let us all know how it went!
13 Comments »
Leave a reply to Stevene Cancel reply
-
Recent
- Potato Onion Video and Multiplier Onion Giveaway
- Deer Hide Ruined by Poor Skinning
- Frankentree is Quite a Sight, With Over 85 Varieties Fruiting This Year! Wow!
- Potato/Multiplier Onion Giveaway and New Site
- Taste Testing Seven Summer Apples, Head to Head
- How to remove back strap sinew without wasting any meat
- Skinning Deer and Goats for Perfect Hides and Carcasses
- Peeling Oak Bark for Tanning Leather and Apple Breeding Update
- Two Sweet Crabs That Don’t Pinch! Trailman and Centennial, Delicious Super Early Crab Apples,
- A Video Tour of my Amateur Apple Breeding Project
- Why I’m Not Selling at the Farmer’s Market Anymore
- Virtual Garden Tour and Seed Packet Give Away for Subscribers
-
Links
-
Archives
- September 2015 (4)
- August 2015 (3)
- July 2015 (4)
- June 2015 (1)
- May 2015 (1)
- April 2015 (1)
- March 2015 (1)
- February 2015 (1)
- January 2015 (2)
- October 2014 (2)
- September 2014 (2)
- August 2014 (1)
-
Categories
-
RSS
Entries RSS
Comments RSS

Very interesting post, Steven. Thanks for sharing your nascent graspings towards what could eventually develop into an important appropriate technology. FYI I am now using a straw-clay mixture similar to what you used to build the pets in all sorts of applications, from making adobe blocks to (with chopped straw) plastering straw bales. I generally call it straw-clay or “heavy straw-clay” (to distinguish it from “light straw clay” or “slipstraw” which has only a fraction of he clay). Massey Burke taught me a mixing system she developed which is a huge time-saver. Simply pour alternate layers of straw and thick clay slip into a wheelbarrow, poking it a bit with your fingertips each time. Let it sit for a few minutes if possible, then pull the material out from the bottom of the wheelbarrow. If you get the proportions right as you go, you don’t really need to mix at all, which is a big time and energy saver compared with mixing on a tarp or just adding the straw bit by bit to the slip. Keep it up!
Hey Michael: I suppose that original straw wattle might have been your innovation. I’ve totally thought about building a while house cob like out of this type of heavy straw clay mix. It’s lighter, more insulative, probably stronger if well interwoven… I could see also incorporation of some sticks rebar style which seems like a mistake in the more brittle cob. I think Tim Kennedy was calling it strawb. I like the mixing system. With that, I could whip out one of those kilns post haste. Are you doing any char experiments over there? Another idea I had before was using crushed charcoal as an insulator. Quite a bit of work to make it, but considering durability, awesome re-use potential, humidity regulation and carbon sequestration, I’m not sure why no one does it. Actually, someone probably does/has. Nothing new under the sun. Or what about something like an insulating board that is mostly charcoal. I’m all “fired up” about charcoal right now. I watched this really cool video on japanese charcoal which inspired me to dig deeper. It’s always been an interest of mine, but there are so many facets to explore. Anyway, still want to talk with you about my alternative foundation idea sometime. Hope to rub shoulders with you somewhere soon.
Japanese charcoal http://www.youtube.com/watch?v=FyYs3gZ9RcU
Yes, I like to think of the straw-clay wattle as my innovation. But, as you say, “nothing new under the sun,” at least as far as traditional materials goes. There was a very similar system used in pre-hispanic Central Mexico for making corn granaries shaped like giant pots. It was essentially identical to the technique you used for making the pets. Both Kiko and Massey (as well as Tim O-K and I and probably many others) have used this heavy straw-clay mixture to replace cob. It is so sticky that weaving together or reinforcing with sticks hardly seems to be an issue, unless you are making a thin wall, in which case you can use either a framework of sticks or some kind of lath like deer fencing (metal or plastic) stretched tight. Massey has done some compression testing on earthen blocks in which the straw-clay blocks performed about as well as a more traditional adobe mixture with sand and not much straw. And the blocks are undoubtedly lighter and easier to handle, as well as more insulating. The only significant downsides I can see are that this mixture uses 5-10 times more straw than traditional cob or adobe (but I’d rather import straw than sand if I have to do one or the other, which I almost always do) and the drying time is slower because the straw retains so much moisture. But it actually gets stiff enough to build on top of faster than traditional cob.
I haven’t heard of anyone using charcoal as a building material. Interesting idea. We haven’t done any char experiments over here yet, but we’re considering it. In the short term Cathy wants to use our charcoal and ash leftovers from the wood stove and pizza oven in the goat pens to help absorb urine and keep smells down, then later that material will make its way to the compost pile and thence the veggie garden. We could use a lot more charcoal for that purpose but there are not so many trees over here. Maybe we could bring you dried figs and apricots in exchange for charcoal and lime.
Cool stuff. maybe some “rebar” sticks would be useful in a strawb block building system. What I have is a shit ton of wood. I could trade for wood. Charcoal and lime are pretty precious. I think if I could produce them for trade, it would probably be pretty expensive. Though I’ve certainly contemplated the possibilities. Being interested in ways that people could start to utilize some of our county’s resources to do sustainable micro-industries when weening off the black market dope economy, I’ve certainly looked at charcoal as a possibility to explore further. For instance, we could produce high quality white charcoal ala the japanese and sell it for a premium to yakitori bars and specialty grills. and of course agricultural char.
Charcoal has little structural use, so making it into a panel or something like could be a difficult problem to solve. But then that foam crap people buy is pretty weak too. It seems like it should be explored though. I imagine a six inch wall full of powdered charcoal would have very good if not outstanding insulative value. In that charcoal video that I linked, there is a part where they show using mesh bags (basically like an onion bag) of charcoal packed under a floor as a moisture buffer. It absorbs excess in the winter and gives it off slowly over the summer.
One thing I do now is just quench everything when I’m done with it. Once I’m done barbequeing or whatever, the hose comes out. You can accumulate a surprising amount of char that way. I think the real place to be looking for people like me and you guys is figuring out stoves that can produce char while heating water or spaces. It would entail using more wood, but the heat from char production would be used for something. If I could accumulate the charcoal from a cord of wood over the course of the winter, that could make a real addition. You can also char crop waste. Corn stalks would probably add up pretty quick. Or, maybe you could start a coppice of poplar or some other fast grower for future use.
Yep, charcoal as insulation already been pretty thoroughly explored…
http://books.google.com/books?id=ZiIhAQAAIAAJ&pg=PA463&dq=charcoal+insulation&hl=en&sa=X&ei=rcp_Us3vPKO0iQKTrYGYBA&ved=0CD4Q6AEwAA#v=onepage&q=charcoal%20insulation&f=false
In the Philippines, the small scale charcoal producers use 55 gallon drums. Holes are cut into the bottom sides of the drum. A fire is started in the bottom of the drum, then the drum is filled with wood. After the fire is burning fairly well, the top of the drum is covered. This produces a lot of smoke but seems to make good charcoal, fairly easily and cheaply. Coco lumber is a very hard wood and is the typical wood that is used. Charles Aanonson
That sort of smoulder affair is the typical charcoal production method used everywhere in some form or another. I have done it several different ways. There are cleaner modern methods, but I don’t know if they are as efficient. the coolest method is the Japanese white charcoal, bintochan. That stuff is amazing. It is a similar method, but they control it in such a way as to make this really hard dense charcoal. I want to try to make it. You can see it in this cool video on charcoal. https://youtu.be/dSm3FfegUg8 This is how hard it is…. https://youtu.be/9GpNJKOIX98
I am trying to figure out how the Missionaries might have made their lime mortar. I live in Santa Barbara, CA. We have plenty seashells and also limestone quarries. How is the hydrated lime kept stable before use? I was wondering at what point the shells or limestone is pulverized into small particles before being mixed with sand or clay to make mortar.
Do you know anything about the pink lime plaster used for waterproofing the inside of some Mission era reservoirs? I was wondering if pieces of powdered brick were part of the aggregate that colored the mortar or here in Santa Barbara we have a red sandstone (Sespe Formation) that can be pulverized. Did you figure out a ratio of aggregate to quicklime to water for your various uses? whitewash, plaster, mortar?
Many thanks. I think I may Yoshi from long ago.
I loved your photo essays. Your description made the whole process become so clear.
Sincerely,
Paulina Conn
I have a couple of videos on youtube about lime burning now as well. The hydrated lime back then would almost surely have been lime putty. That means it is slaked in a large quantity of water and settles in the solution as a putty. It is completely stable under water, so it was usually stored in pits. It falls apart itself and does not have to be ground or powdered, it is just sieved as necessary to remove large unslaked pieces. The pink is very likely from crushed pottery, tiles or bricks, or even just clay fired for that purpose. That is one of the ingredients used as a pozzolan to make lime harder and more water proof, or even to cure under water instead of in the air. Volcanic ash, diatomaceous earth and other things were also used, but most of them would either not occur in an area, or would not have been discovered yet. Sandstone would probably not be of any use in that. Ratios of water aren’t much use when using lime putty because its already wet. Most mortars and plasters run around 2 or 3 parts sand to 1 of lime putty I think. If you want to know more, read building with lime by stafford holmes. It’s the reference I know for old lime tech. Here’s my lime burning video. https://youtu.be/jOxaOTUGuKo
Thank you, Stevene. I have watched your videos and read your articles on making slaked lime. Keeping the lime putty underwater and using it as needed sounds practical. The Padres had a couple of architecture and agriculture books that helped them get things started.
Best,
Paulina
I’d like to read those books. Do you know the titles? Someone may have scanned them digitally.
1. . Architectura de M.V.Vitruvo Polión published, Madrid, 1787.
.2. Agricultura General, Madrid, 1777 written by Gabriel Alonso de Herrera and brought from Spain to the new world by Padre Fray Antonio Seyme in 1792.
Evidently these were the two “bibles” that the Missionaries used when they settled Mexico and California. A gal near Lompoc (Santa Rita Canyon) found some Mission grapes on her property that are still bearing fruit for her “Angelica” wine. Fun article on the web at http://ediblenetwork.com/santabarbara/gypsy-canyons-angelica/
Paulina
excellent, thank you!